avocado indoor plant Cold Hardy Avocado Tree – Fresh Avocados, Thrives in Cool Climates
SKU: 73919612845
avocado indoor plant

avocado indoor plant Cold Hardy Avocado Tree – Fresh Avocados, Thrives in Cool Climates

Sale price$22.99 Regular price$25.54
Save 10%

Shipping Estimate
USA
  • USA
  • CAN

Ships within 48 hours · Estimated delivery Jul 7 - Jul 12

Promo Codes Available:

For Your Every Summer RSVP, with Code: SUMMER15

Description

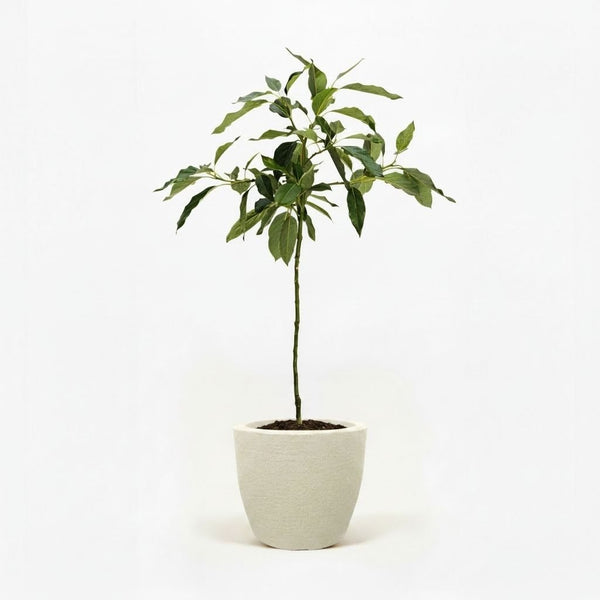
avocado indoor plant Cold Hardy Avocado Tree – Fresh Avocados, Thrives in Cool ClimatesCold Hardy Avocado Tree Grow Avocados Anywhere in the US We've done all the hard work and research on growing avocados here's what you get: Quality Grafted Avocado Trees, Never Seed Grown Seed grown avocado trees can take up to 15 years to produce fruit. They just keep you waiting and hoping that avocados will eventually appear. Our avocado trees are grafted by experts. It is a difficult and expensive process but the end result is a quality tree that

Cold Hardy Avocado Tree- Grow Avocados Anywhere in the US

We've done all the hard work and research on growing avocados- here's what you get:

Quality Grafted Avocado Trees, Never Seed-Grown

Seed-grown avocado trees can take up to 15 years to produce fruit. They just keep you waiting and hoping that avocados will eventually appear.

Our avocado trees are grafted by experts. It is a difficult and expensive process- but the end result is a quality tree that can produce fruit as quickly as the first year!

Cold Hardy Down to 20 Degrees

Our Cold Hardy Avocado Trees are a unique variety that thrives even in temperatures as low as 20°F, making them ideal for container growing on patios. Unlike other avocado trees, this cultivar is more forgiving, so you won't need to constantly monitor temperatures or rush to bring your tree indoors during cooler fall and winter nights.

The Perfect Avocado Tree to Grow in Containers

We handpicked the perfect variety to be grown in a pot on your patio or indoors:

  •  When potted, they only grow 6-8 ft. tall, with a strong branching system that will produce a ton of fruit!
  • tolerates constant pruning, so you'll easily be able to keep it a manageable size for its entire life.
  • Shallow root system, which means that you won't need to consistently repot your tree into a different container

Just bring your potted avocado tree indoors during the winter months. It will continue to thrive without disturbing the fruiting process!

At Nationwide Plants, LLC, we believe in bringing the garden to life no matter where you are. With the Cold Hardy Avocado Tree, you can enjoy the luxury of fresh, buttery avocados straight from your backyard – even if you live in colder climates!


Why Choose the Cold Hardy Avocado Tree? 

The Cold Hardy Avocado Tree is not only an exceptional fruit-bearing tree but also a resilient beauty that thrives in a variety of conditions. Whether you live in a warmer zone or somewhere where temperatures drop, this avocado tree has you covered.

  • Cold Resistance: This tree is specially bred to handle temperatures as low as 20 degrees Fahrenheit, making it perfect for regions beyond typical avocado-growing areas.
  • Delicious, Home-Grown Avocados: Experience the joy of harvesting your own avocados. With a richer, creamier flavor than store-bought varieties, these avocados have a paper-thin skin and high oil content, perfect for guacamole, salads, or simply enjoying fresh.
  • Year-Round Greenery: The Cold Hardy Avocado Tree remains an evergreen, so you can enjoy its bold, lush foliage throughout the year, adding a touch of greenery even in the winter months.

Effortless Growing – Inside or Out

The Cold Hardy Avocado Tree adapts well to both indoor and outdoor environments. It’s the perfect tree for planting directly in the ground or for container growing, making it suitable for nearly any space.

  • Grow Indoors or Outdoors: If you live in a colder zone, simply bring your tree indoors during the winter months. It continues to grow happily indoors, thriving in a sunny spot like a patio or sunroom.
  • Self-Fertile: While the tree is self-pollinating, planting an additional tree will increase your harvest. Either way, you'll enjoy the rich, buttery fruits with little effort!
  • Fast Results: Unlike seed-grown trees that take 10 years or more to fruit, our Cold Hardy Avocado Tree is grafted and can produce fruit within its first 3 years, sometimes even sooner.

Care Instructions Made Easy

The Cold Hardy Avocado Tree is designed for ease, meaning it requires minimal care while rewarding you with bountiful harvests year after year.

  • Sunlight: This tree loves full sun. For best results, ensure it gets 6-8 hours of direct sunlight each day, whether it's indoors or outdoors.
  • Watering: Water your tree once or twice a week, depending on the climate. Let the soil dry out between waterings, especially if grown in a container.
  • Soil: The tree thrives in well-drained soil. If you’re planting in a pot, make sure to choose a container with drainage holes and a base of nutrient-rich, organic soil.
  • Fertilizing: Feed your avocado tree with a balanced fertilizer four times a year, starting after the first year of growth. For organic growers, we recommend our organic root boosters for healthy roots and foliage.

The Ultimate Versatility

The Cold Hardy Avocado Tree is incredibly versatile, with multiple planting options that allow you to shape your tree to suit your space.

  • Container-Friendly: If space is limited, plant your tree in a pot and keep it manageable, growing to around 5-7 feet tall.
  • Full-Sized Outdoor Growth: If planted outdoors, expect your tree to reach heights of 15-20 feet, providing both shade and beauty to your landscape.

Why Nationwide Plants, LLC?

At Nationwide Plants, LLC, we ensure that each Cold Hardy Avocado Tree you receive is hand-selected for quality and health. Our trees are grafted, meaning you’ll get a stronger, faster-growing tree with earlier fruit production.

  • Ready to Thrive: Our trees are already well-established and prepped for their new home. They arrive healthy, happy, and ready to grow.
  • Premium Varieties: When you order, you’ll receive one of four premium avocado varieties: Mexicola, Brogdon, Oro Negro, or Bacon – all known for their rich, creamy flavor and hardy nature.
  • Fast Fruit: Many of our larger trees produce fruit within the first year, ensuring that you can enjoy fresh avocados sooner.

Order Your Cold Hardy Avocado Tree Today!

The Cold Hardy Avocado Tree makes it easy to enjoy fresh, creamy avocados right from your own garden, even in cooler climates! This resilient tree is both low-maintenance and highly productive, making it perfect for gardeners of all skill levels. With its ability to thrive in a variety of conditions, it’s a must-have for avocado lovers looking to grow their own. Take advantage of our delivery right to your door, and bring the Cold Hardy Avocado Tree home today—order now and start enjoying homegrown avocados!

Order now from Nationwide Plants, LLC and start growing your own avocados!

Shipping Notes
  • Free Standard Shipping on $100+ Orders to the USA.
  • Except Preorder products are shipped in 48 hours.
  • Delivery to the USA:
  1. Standard Shipping : 3-10 business days
  • If time is of the essence, please consider selecting expedited delivery for faster service.
Exchange/Return Notes
  • We offer a 30-day return/exchange service after receiving.
  • Final sale items are not eligible for returns or exchanges.
  • To process your return/exchange, please contact us at [email protected]
  • Please click here for more details>>> Return & Exchange Policy
SKU: 73919612845

Discover Niche Categories That Outsell avocado indoor plant

Top-Converting Item to Boost Your Average Order

4.3 ★★★★★
Based on 1170 reviews
Sort
Highest Rating
Newest First
Oldest First
Product Reviews
E
Verified Purchase
Eric J. Jenislawski
Boise, US
★★★★★ 5
Great result, exceptional value, and easy, forgiving application.
Size: TRIM COAT KIT
I am thoroughly pleased with the results of this product, and the application was easier than I expected. Outstanding stuff. I am writing a longer review in case it helps people who are unsure about a "once and done" product that calls itself permanent. It's not hard to apply. It is forgiving and there's time to even it out. But here are some things to anticipate. My use case: I used Cerakote to restore the plastic trim on a used 2014 black Dodge Challenger that had been repainted but the plastic trim was original and it had been kept outside by the prior owner, so the contrast between the new paint and faded trim was noticeable. The trim was originally a deep, dark gray (it is never as black as the paint). It had faded to a medium-gray in many places: running boards on the side beneath the door, below the read bumper (which were also somewhat worn from debris), around the tail lights, and the plastic piece beneath the windshield wipers between the windshield and the hood. These were all looking weathered. The trim was very oxidized in some places, chalky grey near the hood and around the back bumper. The plastic around the tail lights also had light streaks in it from where water drains down from the trunk. What else I tried before I tried Cerakote: I got middling results from Mother's Back to Black. It looked somewhat better for a week or two, and then it went back to looking as before. Not impressed. I got a tip online to try rubbing the plastic trim with a melamine magic eraser, so I did that next, and this made a significant difference. Melamine is abrasive, so be careful if you do this on your trim. I went gently, up-and-down, side-to-side and in small circles, by hand, with gentle pressure like one would with a polishing compound. By removing the oxidation, the plastic was a few shades darker in the worst spots and the streaking on the rear tail light piece was gone. The rough spots on the trim at the bottom of the car and around the wheels looked somewhat better. But it certainly did not "like new." Cerakote experience: I decided to give Cerakote a try based on the video and good reviews. Bam! Back to factory-like deep dark gray. I wish I had taken pictures. It's incredible. Fully satisfied! I had already washed the trim with Dawn dish soap. I started with the trim bone dry. You are warned everywhere that water droplets will ruin the result, so don't expect to do this process right after you wash the car unless you like to live dangerously and have compressed air to spray cracks and crevices. I was worried that application would be streaky if I didn't do it right. Not so. It is forgiving. Here's what I learned. 1) The first 20% of what you'll get out of the packet goes on heavy with the lightest touch. One packet goes a long way. The next 60% is the "normal" application. This goes on the easiest. You can really milk the last drop out of each towelette, but I didn't because the last 20% of what you can get out of it by rubbing it really hard comes out very light and is not worth the uneven application unless you have some random area you don't care much about and want to use the remainder for that. I only used 5 packets to do the whole car. When you start a new packet, the beginning is where you might want to go back later and even it out once the application gets more normal. Or better, start a new packet on a big section to spread it around well and then move to smaller trim when the towelette is less fresh. 2) You've got time to work with it and make corrections. It stayed liquid like water for at least 20 minutes in my conditions: about 80 degrees, not very humid, indirect sunlight on an 80 degree car. Don't apply in direct sun or on a hot car. The product then gets sticky as it cures, but you can still work with it during the sticky time, rubbing it in and spreading it evenly with the towelette. I did not use a microfiber to "knock down" heavy spots. I just came back around with the towelette. I think a dry microfiber might pull off too much product. When it is half-cured, it is sticky and you can buff it with the towelette at this stage to further flatten and even things out. Work in sections, one piece of trim at a time. 3) Overlaps won't show as long as you rub it all in thoroughly. I tried the overlapping parallel passes method that they recommend, and this works pretty well. I was worried that I might get a "double heavy" streak where the passes overlap but this not so unless the towelette is fresh, but this is fixable. You can do a pretty natural, casual back-and-forth motion for the most part and it comes out fine. This is NOT a super-finicky product. I made a second or third back-and-forth pass in a few areas, and used circular motion in some places where the trim was textured or a little rough from wear, and it all looked even in the end. Just rub it down into the plastic and even out the sheen while it is uncured and it's good. 4) It cures like you see it when it's still wet. It doesn't lighten up very much as it cures. It just looks a little less wet. So get it right by eye when it is wet and that's pretty much what you will still have in an hour when it is cured. 5) Don't miss a spot! You'll see it for sure if you do because the different is so dramatic. And a "second coat" is not easy or recommended. This is the only once-and-done part that you want to get right, and you have plenty of cure time to be thorough. 6) Use the folded corner of the towelette to get into small corners and edges, like where the trim meets the paint or has an inside corner or some little nook. A fresh towelette is great for getting into small areas because a feather touch applies plenty of product when the towelette is fresh. The trim now looks amazing and I am entirely satisfied. I will use Cerakote on my other vehicles. The only minor con is a strong ammonia smell when you are up close to it while it is wet. No smell once it is cured. I would definitely wear the recommended gloves while applying. As others say, you will probably drop that towelette on the ground. It's slippery when wet. Keep it folded in quarters as it comes for ease of application. Turn to a new quarter once a side gets dirty or dry and fold it inside out for four more quarters to use. Bonus, but off-label -- at your own risk: The product is not intended for the soft rubber around the windows, but I tried it there too, and it looks amazing. All I did was wash the rubber with dish soap like the trim, and I rubbed it a few times with a wet microfiber cloth to get the superficial layer of oxidized rubber off. Then I applied Cerakote. It looks great. The rubber used to be blotchy and faded. The microfiber evened this out a little. I would not use melamine on the rubber -- this made it look worse in a test section. The Cerakote made it look great: jet black, much shiner, and much more even looking. Not quite "brand new" but far better than I thought possible. I thought I might need to replace the rubber. Now it's looking great next to the jet-black new paint. This afterthought use alone was worth the money. Can you apply a second coat the next day? They don't say you can, and I don't recommend it. This is meant to be one-shot, which is why you should check to make sure you don't miss any spots. I had two areas where I tried a second coat the next day. The first was on the plastic trim between the windshield and the hood. I didn't rub this trim much with melamine beforehand so there was a lighter area (light grey originally, the worst spot) that didn't get as black as the other sections so I did it again, which helped a little, but not much. I didn't wash this area with soap beforehand because I wasn't intending to fix it until I got going. Once you put things back to black you will start noticing other faded things more. Likewise, I did a second coat on the very top of the soft rubber at the bottom of the windows (the part which faces upward and thus gets the most sun), it wasn't as shiny as the other parts, so I went over that section gently again the next day with a fresh towelette. As soon as I did it, I thought it was a mistake. This didn't go well initially because the cured coating is very hydrophobic so the new, wet, Cerakote of the second coat goes on smooth initially and then "puddles up" into little droplets a few minutes later. It doesn't want to stick to the first coat. I thought I had messed it up, but I let it cure a little until the sticky phase, and spread it out again with the towelette. It stayed that time but gathered back a little into some streaks. I spread it once more a few minutes later and it looked good. It stayed even. It looks just fine a few days later, so I think it cured OK. I hope this product last for months as advertised. Even if it doesn't I would totally do it again because the results are superior, I still have half my towelettes left, and the product is not expensive. 10/10 would do again and will recommend to everyone.
WAS THIS REVIEW HELPFUL?YesReportShare
Reviewed in the United States on June 25, 2025
R
Verified Purchase
Robert Barger
Port Orchard, US
★★★★★ 5
Easy to use, amazing results
Size: TRIM COAT KIT
This is an awesome product that is easy to use and has amazing results. My plastic trim never looked so good.
WAS THIS REVIEW HELPFUL?YesReportShare
Reviewed in the United States on May 14, 2026
N
Verified Purchase
NorthFloridaLT
Natrona Heights, US
★★★★★ 5
Made My Bumper Look Brand New Again
Size: TRIM COAT KIT, Size: TRIM COAT KIT
I used this on the plastic trim and bumper on my truck, and I’m honestly impressed with how it turned out. The faded areas came back to a deep, rich black and really cleaned up the whole look of the rear end. I prepped everything the right way by washing it first with an all purpose cleaner, then wiping it down with 91% alcohol. I also taped off the surrounding paint and chrome just to be safe. After that, the application was simple and went on smooth without any streaks or blotchy spots. The difference was immediate. What used to look dull and worn now looks factory-fresh again. It also seems to bond well and not just sit on the surface like some cheaper products I’ve tried before. Overall, this was easy to use, gave great results, and made a noticeable improvement. I would definitely use it again on other trim pieces.
WAS THIS REVIEW HELPFUL?YesReportShare
Reviewed in the United States on April 12, 2026
E
Verified Purchase
E N.
Alexandria, US
★★★★★ 4
Good product
Size: TRIM COAT KIT
Good coverage. I've had it on for about 10 days, and it's holding up better than any spray product I've used. Not perfect, but none of those streak lines you get with other products. It's been rained on twice so far.
WAS THIS REVIEW HELPFUL?YesReportShare
Reviewed in the United States on May 8, 2026
E
Verified Purchase
ernieupton
San Leandro, US
★★★★★ 5
good product and value
Size: TRIM COAT KIT
worked great on the 10yr old outback. Lasted several months..until we traded it in for a new outback.. will find something else to use it on...!
WAS THIS REVIEW HELPFUL?YesReportShare
Reviewed in the United States on May 20, 2026

recommand products