large aloe vera plants Buy Aloe Vera Yellow Phoenix, AZ | Aloe barbadensis
SKU: 30688455428
large aloe vera plants

large aloe vera plants Buy Aloe Vera Yellow Phoenix, AZ | Aloe barbadensis

Sale price$24.10 Regular price$26.78
Save 10%

Shipping Estimate
USA
  • USA
  • CAN

Ships within 48 hours · Estimated delivery Jul 7 - Jul 12

Promo Codes Available:

For Your Every Summer RSVP, with Code: SUMMER15

Description

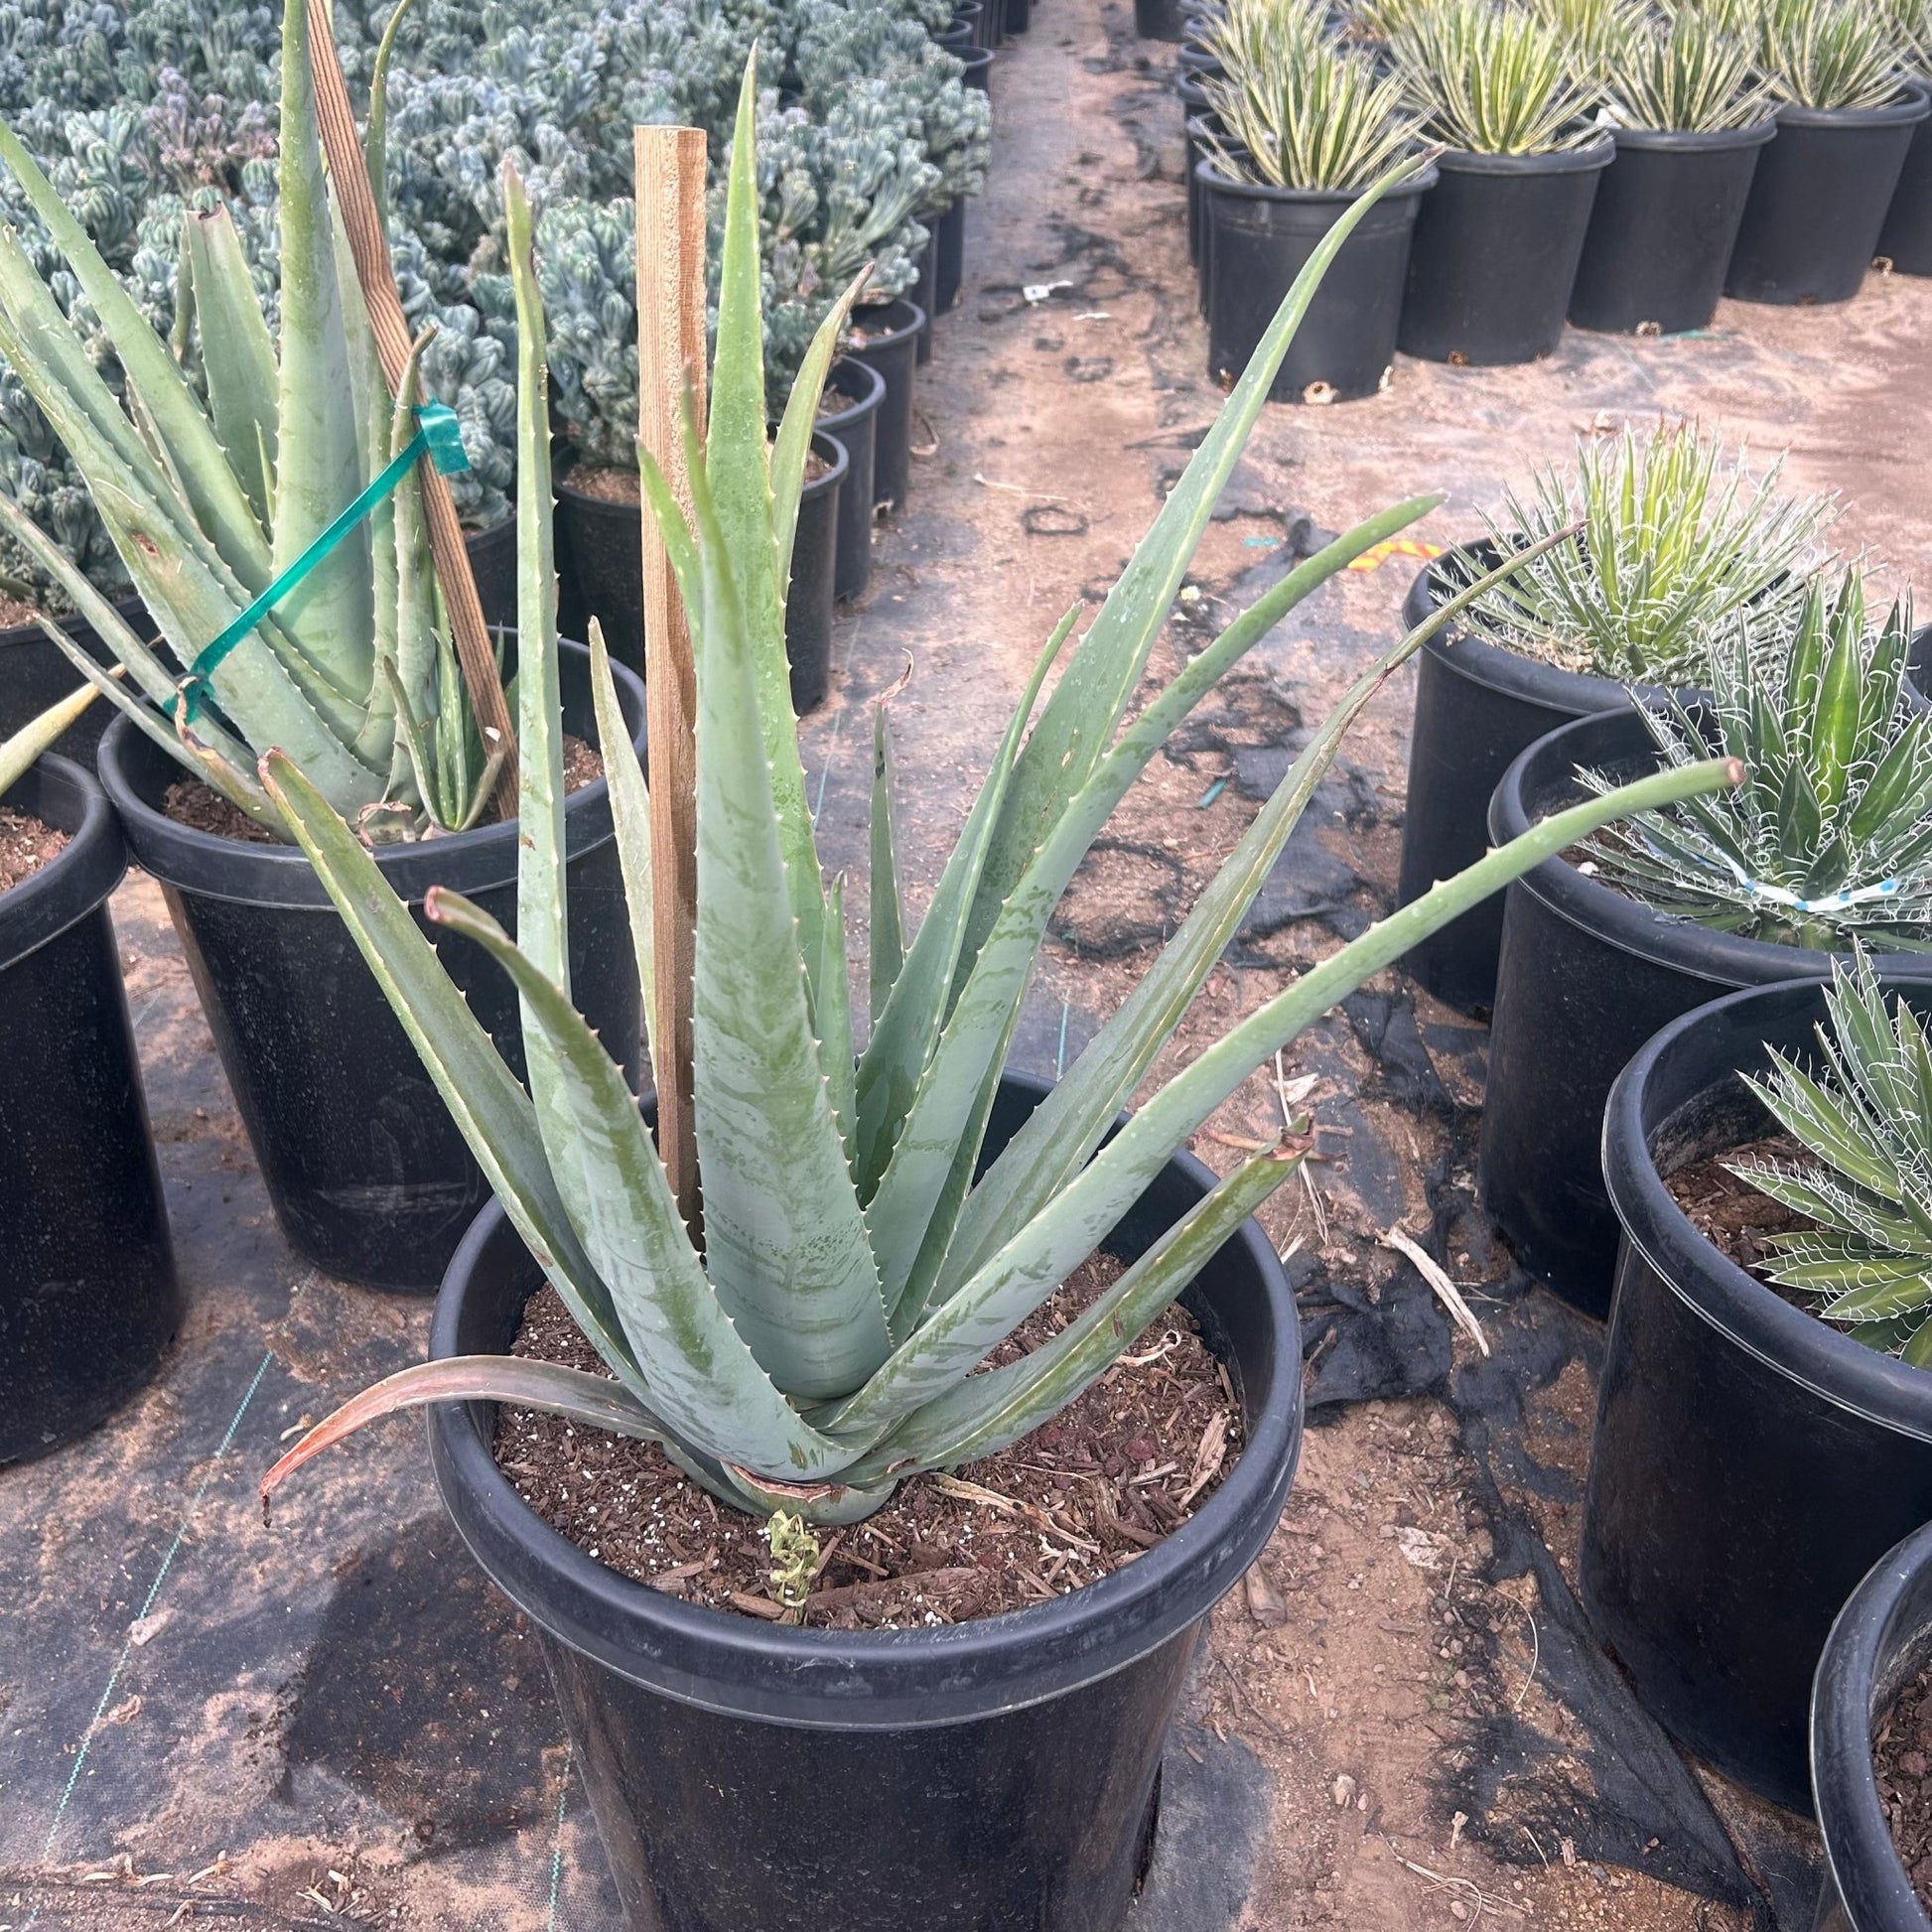
large aloe vera plants Buy Aloe Vera Yellow Phoenix, AZ | Aloe barbadensisPhoenix's Classic Medicinal Aloe With Sunny Yellow Blooms Aloe vera (Aloe barbadensis) yellow flowering variety is the iconic medicinal aloe that thrives effortlessly across the Phoenix Valley. This fast growing succulent forms large rosettes of thick, gel filled leaves used for centuries to soothe burns and nourish skin, while producing cheerful yellow flower spikes that brighten the winter and spring landscape. Whether you're starting a medicinal

Phoenix's Classic Medicinal Aloe With Sunny Yellow Blooms

Aloe vera (Aloe barbadensis) — yellow flowering variety — is the iconic medicinal aloe that thrives effortlessly across the Phoenix Valley. This fast-growing succulent forms large rosettes of thick, gel-filled leaves used for centuries to soothe burns and nourish skin, while producing cheerful yellow flower spikes that brighten the winter and spring landscape. Whether you're starting a medicinal herb garden in Scottsdale, filling a sunny border in Tempe, or creating a drought-tolerant mass planting in Gilbert — yellow Aloe Vera is one of the easiest, most rewarding desert plants you can grow.

Aloe Vera (Yellow) Plant Details

Attribute Detail
Scientific Name Aloe barbadensis (Aloe vera)
Common Names Aloe Vera, Medicinal Aloe, Yellow Aloe Vera
Mature Height 1–2 feet
Mature Width 2–3 feet
Growth Rate Fast — fills in quickly in Phoenix's warm climate
Sun Full sun to partial shade. Handles reflected heat.
Water Low once established. Highly drought-tolerant.
USDA Zones 9–11 (Phoenix is Zone 9b–10a)
Soil Well-draining. Adapts to Arizona caliche soils.
Foliage Evergreen — thick, gel-filled leaves year-round
Bloom Color Yellow flower spikes, winter to spring
Special Feature Medicinal gel — soothing for burns and skin care

Aloe Vera (Yellow) Uses in Phoenix Landscapes

Medicinal & Herb Gardens

Yellow Aloe Vera is the must-have plant for any medicinal garden in the Phoenix area. Keep it near your kitchen or patio door for instant access to fresh soothing gel whenever you need it for sunburn, minor burns, or skin irritation. It pairs beautifully with rosemary, lavender, and other useful desert herbs.

Mass Plantings & Ground Cover

With its fast growth and prolific pup production, yellow Aloe Vera makes a fantastic living ground cover for sunny slopes, median strips, and large landscape beds. Space plants 2–3 feet apart and they'll fill in within a season. When the yellow flower spikes emerge in winter, the effect across a mass planting is spectacular — neighborhoods in Chandler, Mesa, and Peoria use this technique to great effect.

Pool-Friendly & Foundation Plantings

Aloe Vera's clean rosette form and lack of sharp spines make it ideal around pools, patios, and along foundation walls. It tolerates splash-out chlorine, won't drop messy leaves, and stays evergreen year-round. The sunny yellow blooms add warmth to any outdoor living space.

Container Gardens

Yellow Aloe Vera thrives in containers on patios, balconies, and porches throughout the Valley. Use a well-draining cactus mix in a pot with drainage holes. Containers make it easy to share pups with friends and neighbors — this is one of the most generous plants in the desert.

Best Time to Plant Aloe Vera in Phoenix

Fall (October–November) is the ideal window — warm soil encourages rapid root growth while cooler air reduces transplant stress, giving the plant 6–8 months of establishment before summer. Spring (February–April) is the second-best option. Aloe Vera is tough enough to plant almost year-round in Phoenix, but avoid the peak summer months (June–August) if possible.

How to Plant Aloe Vera

  1. Dig wide, not deep — 2–3x the root ball width, same depth as the container.
  2. Check for caliche — break through any hardpan layer for good drainage.
  3. Backfill with native soil — Aloe Vera is not fussy; a light 20% perlite blend improves drainage.
  4. Spacing — 2–3 feet apart for mass plantings; 3 feet for individual specimens.
  5. Water basin — build a 3–4 inch ring to direct water to roots during establishment.
  6. Mulch — 2–3 inches of gravel or decomposed granite around the base.

Watering Aloe Vera in Phoenix

First Year Watering Schedule

Weeks 1–2: Every 2–3 days, deep and slow. Month 1–2: Every 3–4 days. Month 3–6: Every 7–10 days (every 5–7 days in peak summer). After Year 1: Every 10–14 days in summer; every 3–4 weeks in winter. Aloe Vera stores water in its thick leaves — overwatering is the most common mistake.

Drip Irrigation

Place one 1-GPH emitter 8–12 inches from the base. Run for 20–30 minutes per session. Established plants are remarkably drought-tolerant and may only need supplemental water every 2–3 weeks in summer.

How fast does yellow Aloe Vera grow in Phoenix?
Very fast. A 1-gallon plant can reach its full 2–3 foot spread within 1–2 years in the ground, and it produces abundant pups (offsets) that can be divided and replanted.

What's the difference between yellow and orange Aloe Vera?
The yellow and orange varieties are the same species (Aloe barbadensis) with different flower colors. Growth habit, size, medicinal properties, and care are identical — choose whichever bloom color you prefer.

Is the gel in yellow Aloe Vera the same as regular Aloe Vera?
Yes. The thick, clear gel inside the leaves has the same soothing, moisturizing properties regardless of flower color. Simply slice a mature outer leaf and apply the gel to minor burns, sunburn, or irritated skin.

Does Aloe Vera spread on its own?
Yes — Aloe Vera produces abundant offsets (pups) around the base of the mother plant. These can be left to form a colony or divided and replanted elsewhere. It's one of the easiest plants to propagate and share.

You May Also Like

Aloe vera - orange — The orange-flowering version of the same classic medicinal aloe.

Aloe Hybrid — A variegated hybrid aloe with colorful spotted rosettes and vibrant blooms.

Aloe humilis — A compact clustering aloe perfect for rock gardens and small spaces.

Aloe Banseii — A tree-forming aloe that adds dramatic height to succulent gardens.

How Many Aloe Vera Do I Need?

Yellow Aloe Vera is a fast, clumping rosette 2 to 3 feet wide that pups freely, so it reads as a living groundcover when planted in drifts. Use roughly 30-inch spacing (center to center) for solid coverage. Plant the table counts below, then let the pups knit the gaps closed within a season.

Area to cover Plants needed (30 in spacing)
25 sq ft 4 plants
50 sq ft 8 plants
100 sq ft 16 plants
200 sq ft 32 plants

For a single accent or container specimen, one plant is plenty: it will form its own colony over time.

Aloe Vera (Yellow) Season-by-Season in Phoenix

  • Spring (Feb to Apr): Tail end of the yellow bloom spikes, with a strong flush of new leaves and pups as soil warms. Excellent second planting window.
  • Summer (May to Sep): Takes full Valley heat and reflected heat in stride. Growth slows at the hottest peak. Monsoon humidity is fine as long as the soil drains: avoid standing water.
  • Fall (Oct to Nov): Prime planting season. Roots establish fast in warm soil ahead of the cool months.
  • Winter (Dec to Jan): Cheerful yellow flower spikes rise above the rosettes. Aloe Vera is lightly frost-tender: leaf tips can scorch below about 28 to 30°F. In a hard Valley frost, cover the plants overnight or site them under eaves or a canopy.

At a Glance

✔ Hummingbird-Friendly   ✔ Pollinator-Friendly   ✔ Heat-Loving (Reflected-Heat Tolerant)   ✔ Drought-Tolerant   ✔ Pool-Friendly (Low-Litter)   ✔ Spineless   ✔ Evergreen   ✔ Low-Maintenance   ✔ Deer & Rabbit-Resistant

Plant It With

  • Aloe vera - orange: The orange-blooming twin, for a two-tone medicinal aloe drift.
  • Aloe Hybrid: Spotted, colorful rosettes that add pattern next to the clean green leaves.
  • Aloe humilis: A compact clumping aloe that fills the front edge of the bed.
  • Aloe Banseii: A taller tree-forming aloe for height behind the mass planting.

Is Aloe Vera (Yellow) Right for Your Yard?

Yes if you have full sun to light shade, fast-draining or amended caliche soil, and want an easy, useful, spineless succulent that is safe beside pools, walkways, and play areas. It shrugs off heat and drought and shares pups generously. Not the best fit if your spot stays wet or poorly drained, or if it sits in an unprotected frost pocket where temperatures regularly drop below the upper 20s without any cover.

Shipping Notes
  • Free Standard Shipping on $100+ Orders to the USA.
  • Except Preorder products are shipped in 48 hours.
  • Delivery to the USA:
  1. Standard Shipping : 3-10 business days
  • If time is of the essence, please consider selecting expedited delivery for faster service.
Exchange/Return Notes
  • We offer a 30-day return/exchange service after receiving.
  • Final sale items are not eligible for returns or exchanges.
  • To process your return/exchange, please contact us at [email protected]
  • Please click here for more details>>> Return & Exchange Policy
SKU: 30688455428

Discover Niche Categories That Outsell large aloe vera plants

Top-Converting Item to Boost Your Average Order

4.5 ★★★★★
Based on 1334 reviews
Sort
Highest Rating
Newest First
Oldest First
Product Reviews
E
Verified Purchase
Eric J. Jenislawski
Chelsea, US
★★★★★ 5
Great result, exceptional value, and easy, forgiving application.
Size: TRIM COAT KIT
I am thoroughly pleased with the results of this product, and the application was easier than I expected. Outstanding stuff. I am writing a longer review in case it helps people who are unsure about a "once and done" product that calls itself permanent. It's not hard to apply. It is forgiving and there's time to even it out. But here are some things to anticipate. My use case: I used Cerakote to restore the plastic trim on a used 2014 black Dodge Challenger that had been repainted but the plastic trim was original and it had been kept outside by the prior owner, so the contrast between the new paint and faded trim was noticeable. The trim was originally a deep, dark gray (it is never as black as the paint). It had faded to a medium-gray in many places: running boards on the side beneath the door, below the read bumper (which were also somewhat worn from debris), around the tail lights, and the plastic piece beneath the windshield wipers between the windshield and the hood. These were all looking weathered. The trim was very oxidized in some places, chalky grey near the hood and around the back bumper. The plastic around the tail lights also had light streaks in it from where water drains down from the trunk. What else I tried before I tried Cerakote: I got middling results from Mother's Back to Black. It looked somewhat better for a week or two, and then it went back to looking as before. Not impressed. I got a tip online to try rubbing the plastic trim with a melamine magic eraser, so I did that next, and this made a significant difference. Melamine is abrasive, so be careful if you do this on your trim. I went gently, up-and-down, side-to-side and in small circles, by hand, with gentle pressure like one would with a polishing compound. By removing the oxidation, the plastic was a few shades darker in the worst spots and the streaking on the rear tail light piece was gone. The rough spots on the trim at the bottom of the car and around the wheels looked somewhat better. But it certainly did not "like new." Cerakote experience: I decided to give Cerakote a try based on the video and good reviews. Bam! Back to factory-like deep dark gray. I wish I had taken pictures. It's incredible. Fully satisfied! I had already washed the trim with Dawn dish soap. I started with the trim bone dry. You are warned everywhere that water droplets will ruin the result, so don't expect to do this process right after you wash the car unless you like to live dangerously and have compressed air to spray cracks and crevices. I was worried that application would be streaky if I didn't do it right. Not so. It is forgiving. Here's what I learned. 1) The first 20% of what you'll get out of the packet goes on heavy with the lightest touch. One packet goes a long way. The next 60% is the "normal" application. This goes on the easiest. You can really milk the last drop out of each towelette, but I didn't because the last 20% of what you can get out of it by rubbing it really hard comes out very light and is not worth the uneven application unless you have some random area you don't care much about and want to use the remainder for that. I only used 5 packets to do the whole car. When you start a new packet, the beginning is where you might want to go back later and even it out once the application gets more normal. Or better, start a new packet on a big section to spread it around well and then move to smaller trim when the towelette is less fresh. 2) You've got time to work with it and make corrections. It stayed liquid like water for at least 20 minutes in my conditions: about 80 degrees, not very humid, indirect sunlight on an 80 degree car. Don't apply in direct sun or on a hot car. The product then gets sticky as it cures, but you can still work with it during the sticky time, rubbing it in and spreading it evenly with the towelette. I did not use a microfiber to "knock down" heavy spots. I just came back around with the towelette. I think a dry microfiber might pull off too much product. When it is half-cured, it is sticky and you can buff it with the towelette at this stage to further flatten and even things out. Work in sections, one piece of trim at a time. 3) Overlaps won't show as long as you rub it all in thoroughly. I tried the overlapping parallel passes method that they recommend, and this works pretty well. I was worried that I might get a "double heavy" streak where the passes overlap but this not so unless the towelette is fresh, but this is fixable. You can do a pretty natural, casual back-and-forth motion for the most part and it comes out fine. This is NOT a super-finicky product. I made a second or third back-and-forth pass in a few areas, and used circular motion in some places where the trim was textured or a little rough from wear, and it all looked even in the end. Just rub it down into the plastic and even out the sheen while it is uncured and it's good. 4) It cures like you see it when it's still wet. It doesn't lighten up very much as it cures. It just looks a little less wet. So get it right by eye when it is wet and that's pretty much what you will still have in an hour when it is cured. 5) Don't miss a spot! You'll see it for sure if you do because the different is so dramatic. And a "second coat" is not easy or recommended. This is the only once-and-done part that you want to get right, and you have plenty of cure time to be thorough. 6) Use the folded corner of the towelette to get into small corners and edges, like where the trim meets the paint or has an inside corner or some little nook. A fresh towelette is great for getting into small areas because a feather touch applies plenty of product when the towelette is fresh. The trim now looks amazing and I am entirely satisfied. I will use Cerakote on my other vehicles. The only minor con is a strong ammonia smell when you are up close to it while it is wet. No smell once it is cured. I would definitely wear the recommended gloves while applying. As others say, you will probably drop that towelette on the ground. It's slippery when wet. Keep it folded in quarters as it comes for ease of application. Turn to a new quarter once a side gets dirty or dry and fold it inside out for four more quarters to use. Bonus, but off-label -- at your own risk: The product is not intended for the soft rubber around the windows, but I tried it there too, and it looks amazing. All I did was wash the rubber with dish soap like the trim, and I rubbed it a few times with a wet microfiber cloth to get the superficial layer of oxidized rubber off. Then I applied Cerakote. It looks great. The rubber used to be blotchy and faded. The microfiber evened this out a little. I would not use melamine on the rubber -- this made it look worse in a test section. The Cerakote made it look great: jet black, much shiner, and much more even looking. Not quite "brand new" but far better than I thought possible. I thought I might need to replace the rubber. Now it's looking great next to the jet-black new paint. This afterthought use alone was worth the money. Can you apply a second coat the next day? They don't say you can, and I don't recommend it. This is meant to be one-shot, which is why you should check to make sure you don't miss any spots. I had two areas where I tried a second coat the next day. The first was on the plastic trim between the windshield and the hood. I didn't rub this trim much with melamine beforehand so there was a lighter area (light grey originally, the worst spot) that didn't get as black as the other sections so I did it again, which helped a little, but not much. I didn't wash this area with soap beforehand because I wasn't intending to fix it until I got going. Once you put things back to black you will start noticing other faded things more. Likewise, I did a second coat on the very top of the soft rubber at the bottom of the windows (the part which faces upward and thus gets the most sun), it wasn't as shiny as the other parts, so I went over that section gently again the next day with a fresh towelette. As soon as I did it, I thought it was a mistake. This didn't go well initially because the cured coating is very hydrophobic so the new, wet, Cerakote of the second coat goes on smooth initially and then "puddles up" into little droplets a few minutes later. It doesn't want to stick to the first coat. I thought I had messed it up, but I let it cure a little until the sticky phase, and spread it out again with the towelette. It stayed that time but gathered back a little into some streaks. I spread it once more a few minutes later and it looked good. It stayed even. It looks just fine a few days later, so I think it cured OK. I hope this product last for months as advertised. Even if it doesn't I would totally do it again because the results are superior, I still have half my towelettes left, and the product is not expensive. 10/10 would do again and will recommend to everyone.
WAS THIS REVIEW HELPFUL?YesReportShare
Reviewed in the United States on June 25, 2025
R
Verified Purchase
Robert Barger
Alexandria, US
★★★★★ 5
Easy to use, amazing results
Size: TRIM COAT KIT
This is an awesome product that is easy to use and has amazing results. My plastic trim never looked so good.
WAS THIS REVIEW HELPFUL?YesReportShare
Reviewed in the United States on May 14, 2026
N
Verified Purchase
NorthFloridaLT
Belleville, US
★★★★★ 5
Made My Bumper Look Brand New Again
Size: TRIM COAT KIT, Size: TRIM COAT KIT
I used this on the plastic trim and bumper on my truck, and I’m honestly impressed with how it turned out. The faded areas came back to a deep, rich black and really cleaned up the whole look of the rear end. I prepped everything the right way by washing it first with an all purpose cleaner, then wiping it down with 91% alcohol. I also taped off the surrounding paint and chrome just to be safe. After that, the application was simple and went on smooth without any streaks or blotchy spots. The difference was immediate. What used to look dull and worn now looks factory-fresh again. It also seems to bond well and not just sit on the surface like some cheaper products I’ve tried before. Overall, this was easy to use, gave great results, and made a noticeable improvement. I would definitely use it again on other trim pieces.
WAS THIS REVIEW HELPFUL?YesReportShare
Reviewed in the United States on April 12, 2026
E
Verified Purchase
E N.
Louisville, US
★★★★★ 4
Good product
Size: TRIM COAT KIT
Good coverage. I've had it on for about 10 days, and it's holding up better than any spray product I've used. Not perfect, but none of those streak lines you get with other products. It's been rained on twice so far.
WAS THIS REVIEW HELPFUL?YesReportShare
Reviewed in the United States on May 8, 2026
E
Verified Purchase
ernieupton
Fort Morgan, US
★★★★★ 5
good product and value
Size: TRIM COAT KIT
worked great on the 10yr old outback. Lasted several months..until we traded it in for a new outback.. will find something else to use it on...!
WAS THIS REVIEW HELPFUL?YesReportShare
Reviewed in the United States on May 20, 2026

recommand products